Key takeaways
- A Framer online store needs a real commerce backend underneath it. Framer's canvas has no native cart, checkout, or inventory system.
- The fastest path: connect Shopify, sync the catalog into Framer's CMS, drop in product and cart components, then test and publish.
- Most Framer designers reach for a plugin instead of a custom Storefront API build, since a plugin ships in days, not weeks.
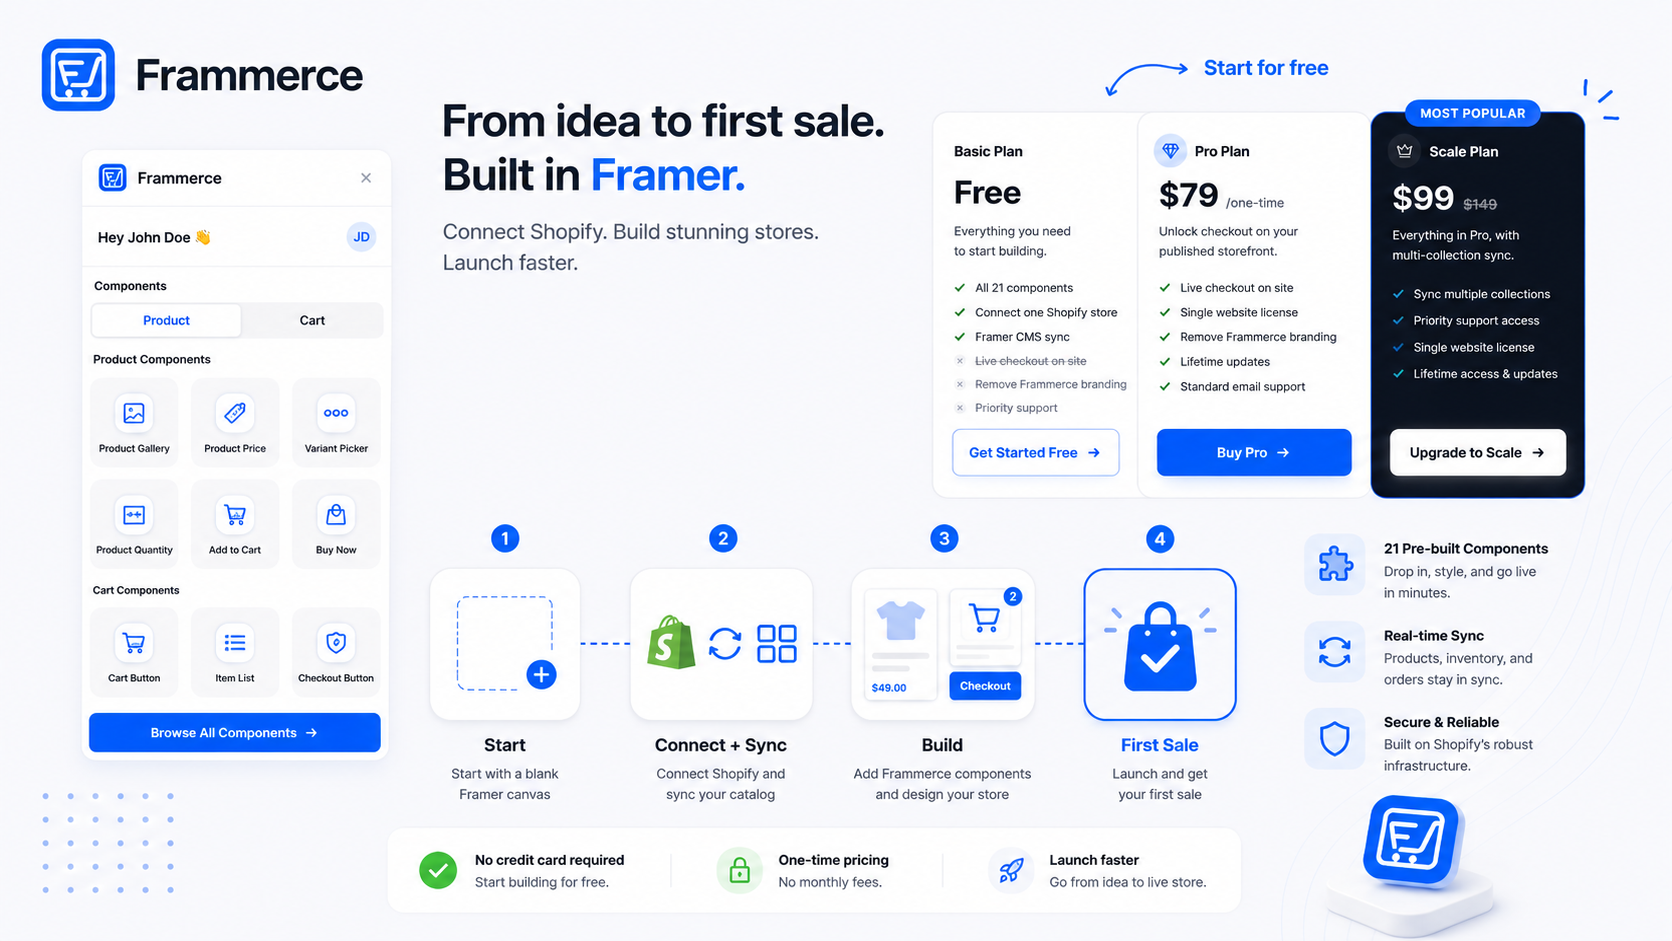
- Frammerce covers steps two and three directly: catalog sync plus 21 pre-built components, one-time pricing from free.
- The step that decides most of your conversion rate happens after launch: checkout friction, not the platform you built on.
What do you need before you start a Framer online store?
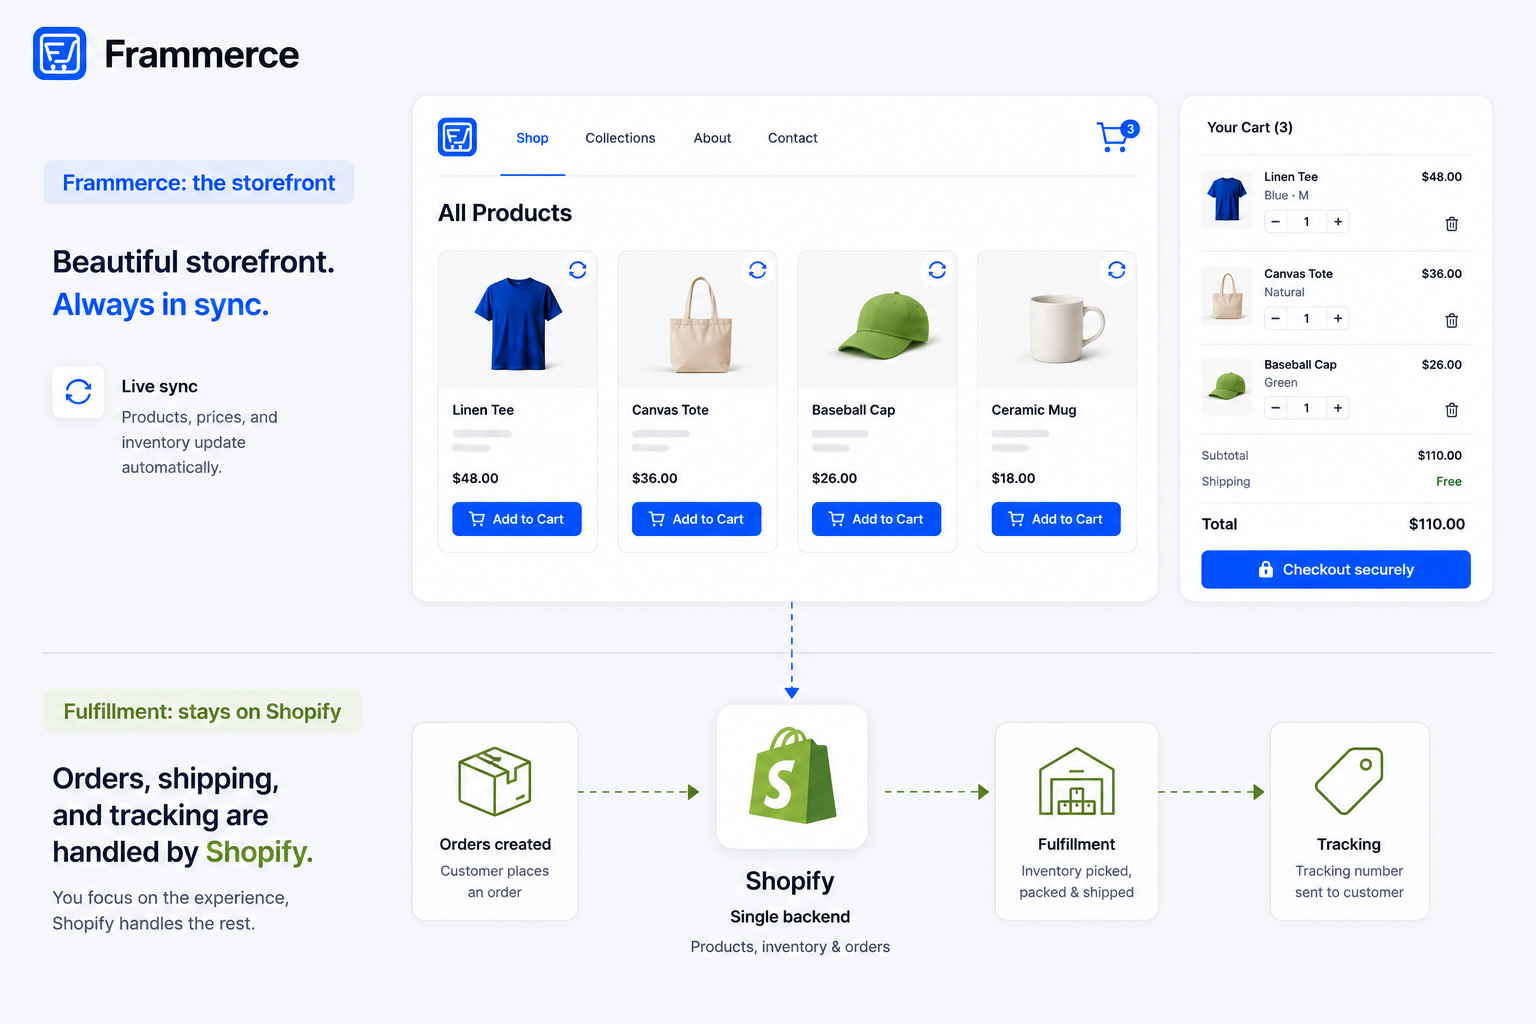
Three things, in order: a Framer project (existing or new), a Shopify store to act as the commerce backend, and a way to connect the two. Framer supplies the canvas and CMS. Shopify supplies inventory, tax, shipping, and payment processing, the parts that need to be reliable and boring, not the parts you want to hand-design. The connection between them is either a plugin or a custom build against the Storefront API. For the broader question of how Framer and Shopify's responsibilities divide in the first place, our framer vs Shopify breakdown covers that in full.
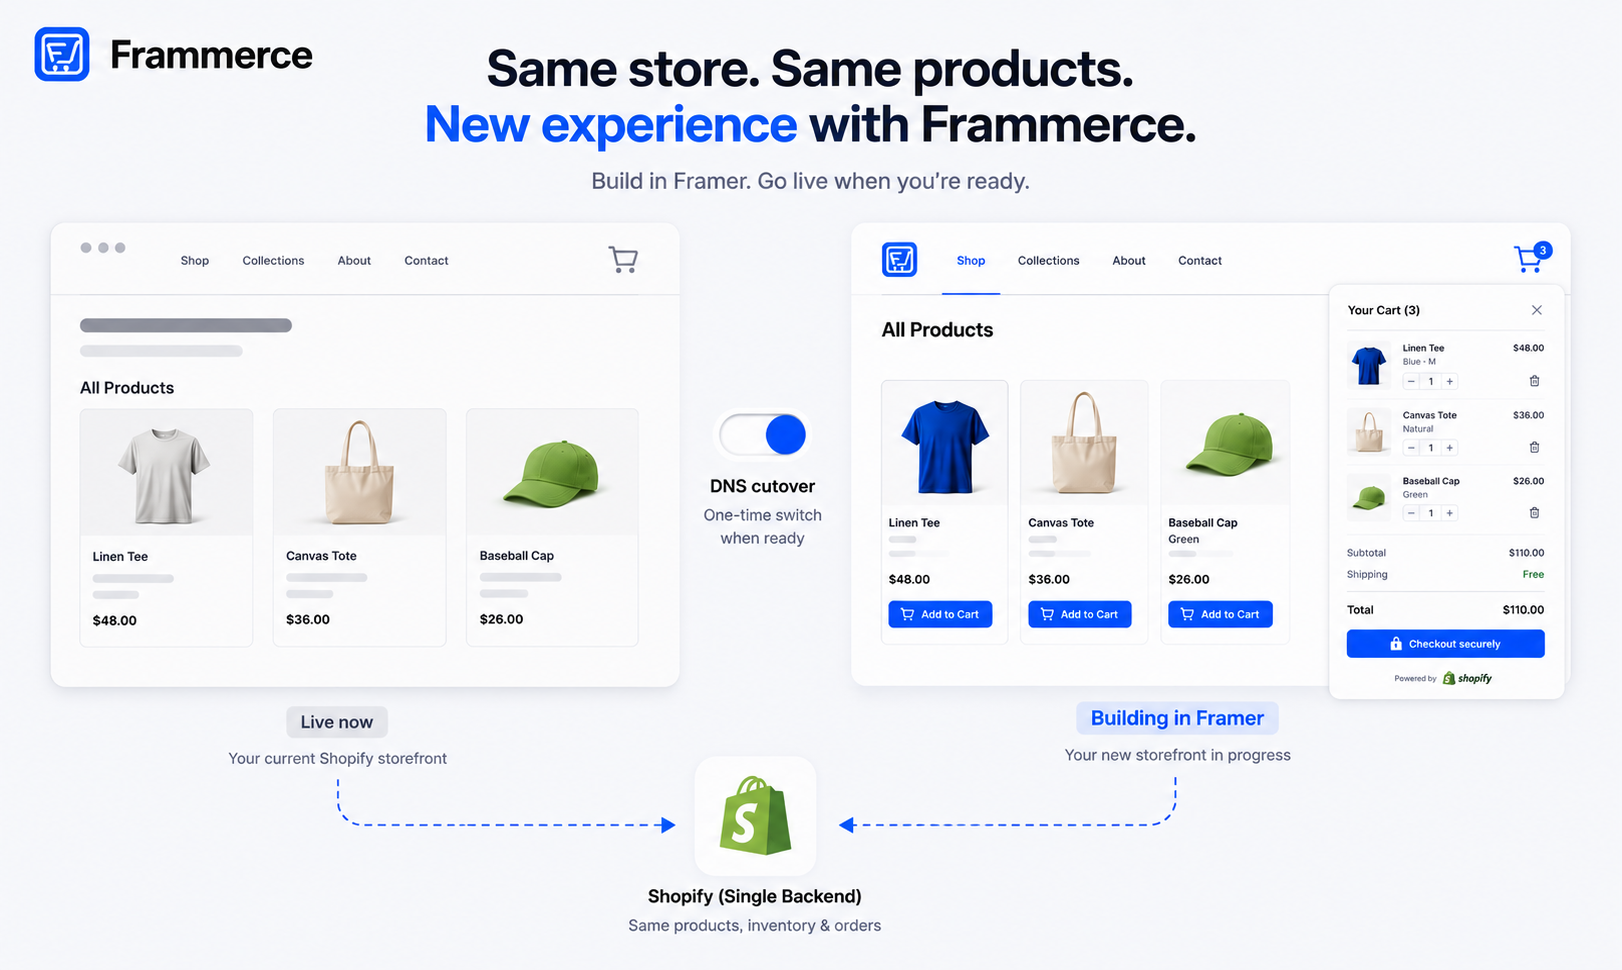
If you do not have a Shopify store yet, a free development store is enough to build and test against before you launch. If you already have a Framer site, you do not need to rebuild it, commerce components drop into existing pages.
What's the fastest way to start a Framer online store?
A plugin that syncs your Shopify catalog into Framer's CMS and ships pre-built commerce components. That skips the two slow paths: writing GraphQL calls against the Storefront API by hand, or bolting a generic page builder onto Shopify and fighting its layout system the whole way through.
With a synced setup, your products, variants, and inventory live in Framer's CMS as structured collections, so you design product grids, variant pickers, and a cart drawer the same way you design any other part of a Framer canvas: drag it in, style it, publish. No templating language, no separate storefront codebase, no server to run.
How to start a Framer online store, step by step
The sequence stays the same whether you are starting from a blank canvas or adding commerce to a site you already run.
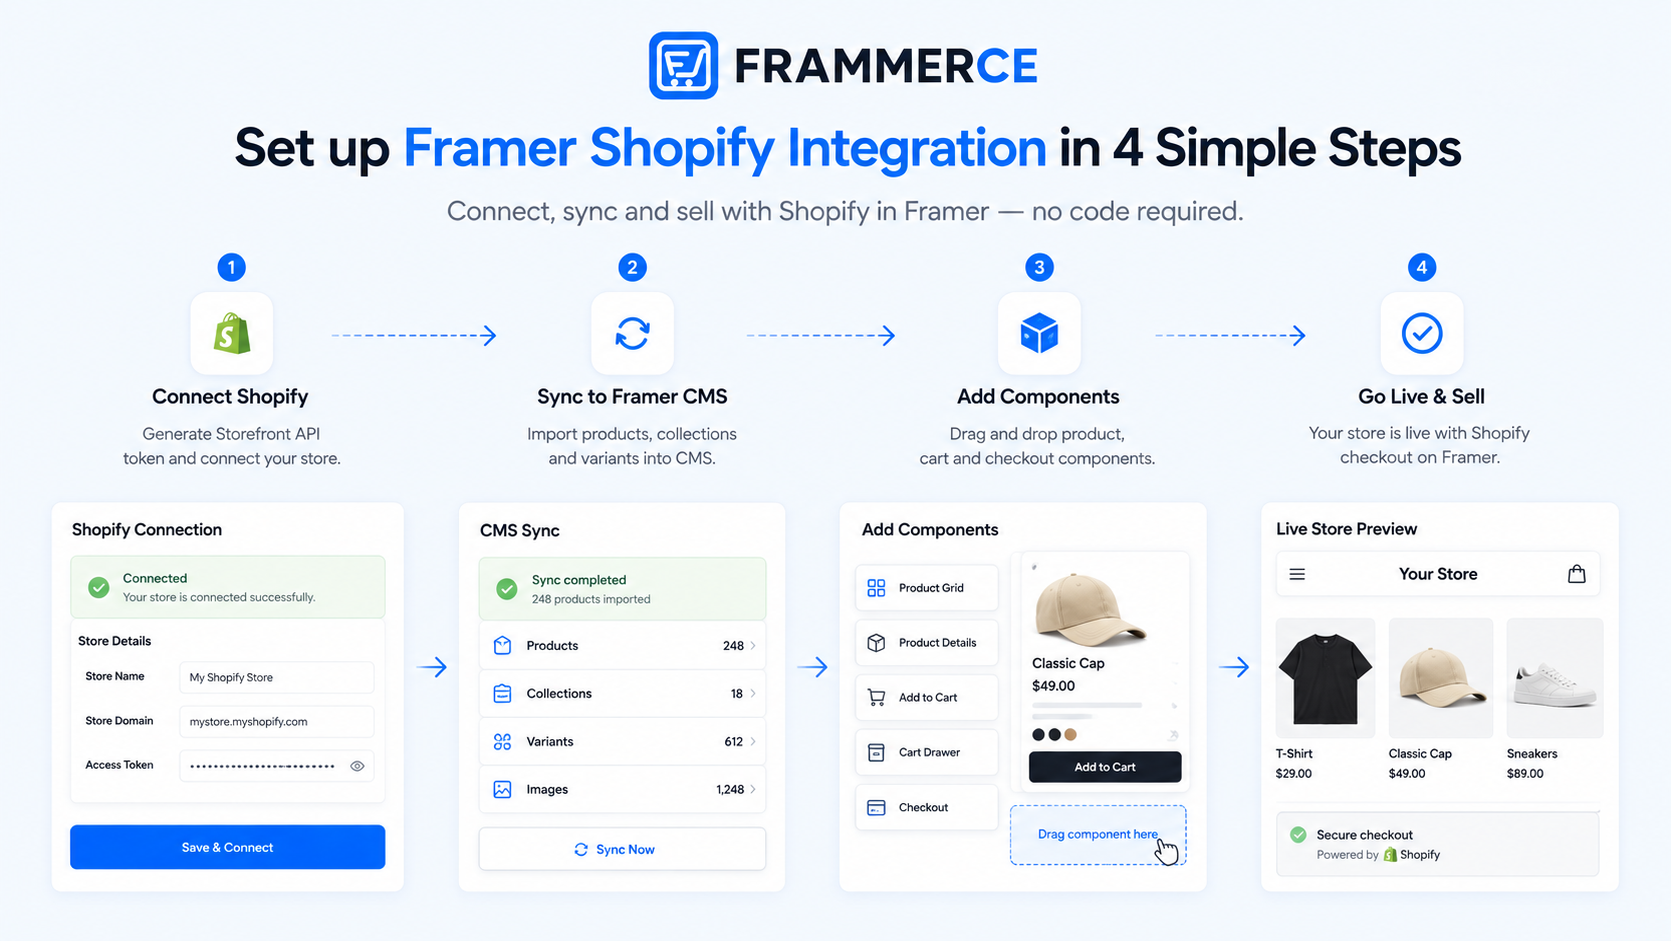
- 1Connect your Shopify store
Generate a Storefront API token from your Shopify admin, and connect it through your plugin of choice, or your own API client if you are building custom.
- 2Sync your catalog into Framer's CMS
Products, variants, and inventory land as CMS collections, the same structure Framer's CMS uses for any dynamic content.
- 3Add product and cart components to your pages
Product Gallery, Price, and Variant Picker on product pages, a cart drawer with Item List and Subtotal wherever you want cart access.
- 4Wire the checkout handoff
A Checkout Button component sends the cart to Shopify's hosted checkout, where payment, tax, and fraud protection run.
- 5Test the full path
Add a product to cart, adjust quantity, remove a line, and complete a test checkout before publishing.
- 6Publish
The catalog stays live-synced from Shopify, so inventory and pricing updates show up without republishing the site.
A setup guide walks through this same sequence in more depth if you want screenshots and specific settings alongside each step, and the ecommerce website guide covers the full architecture behind it.
Step one usually takes minutes once you know where to look in Shopify's admin. Steps two and three are where most of the actual time goes, since catalog size and how many product page variations you want to design both scale the work. Steps four through six are close to fixed cost regardless of catalog size: wiring a checkout button and running a test order takes about the same amount of time whether you are selling five products or five hundred.
What should your first product page include?
Keep the first version simple. A product page needs, at minimum, a gallery, the active price, a variant picker if the product has options, a quantity input, and an add-to-cart action. Stock status is worth adding early too, since a shopper adding a sold-out item to cart is a bad first impression to launch with.
Everything past that (size guides, related products, reviews) is worth adding once the core path works, not before. A Framer online store with one clean product page template applied consistently across the catalog beats five inconsistent, half-finished ones.
What mistakes slow a Framer online store launch down?
A few show up repeatedly. Mapping CMS fields loosely instead of matching Shopify's schema exactly, which breaks silently and shows the wrong price or a missing variant on a live product. Skipping a full test checkout before publishing, which means the first real order is also the first time anyone actually clicked the checkout button. Designing the cart drawer before confirming it reflects real cart state, which wastes design time on a component that still needs rework once it is actually wired up.
All three are avoidable by doing the wiring and testing steps (steps two through five above) before investing heavily in visual polish. Get the store functioning first, then spend the extra design time once you know the underlying data and cart behavior are solid.
Do you need a plugin, or can you connect Shopify yourself?
You can connect Shopify yourself, but it is a real engineering project, not a design task. Two problems make the custom path slower than it looks at first. CMS field mapping: Shopify's product schema, variants, options, metafields, inventory levels, has to line up with Framer CMS fields exactly, and a mismatch breaks the sync silently until a product goes live with the wrong price. Cart state across pages: a cart is not a single component, it is state that has to persist as a shopper moves from a product page to a collection page to checkout, and Framer's canvas has no built-in mechanism for that.
A plugin solves both by owning the mapping and the cart state, which is why most Framer designers, freelancers, and small agencies starting a Framer online store reach for one instead of writing the connection by hand. Our plugin vs custom build breakdown covers that decision in more depth, and once you have decided on a plugin, comparing plugin options by sync depth and component coverage is the next step.
The custom path is still the right call in specific cases: multi-vendor marketplace logic, an ERP integration a plugin was never built to talk to, or checkout rules no standard component covers. Those are the exceptions, not the default, for the audience actually searching for how to start a Framer online store, most of whom are running a standard catalog with normal variants and one Shopify store.
How much does it cost to start a Framer online store?
Depends on the path. A plugin-based Framer online store typically costs the price of your Framer plan, your Shopify plan, and the plugin itself, sometimes free to start. Frammerce's pricing, for example, is one-time, not a recurring charge stacked on top. Basic is free and includes all 21 components, one Shopify store connection, and CMS sync, no live checkout on a published site yet. Pro is a one-time $79 and unlocks live checkout, a website license, and lifetime updates. Scale is a one-time $99, down from $149, and adds multi-collection sync for larger catalogs.
A custom Storefront API build sits in a different bracket entirely, commonly well into four figures once engineering time is factored in, since you are paying for a bespoke build rather than a synced, pre-built path.
Laid out by cost source, a plugin-based launch usually breaks into three pieces: your Framer plan (recurring, set by Framer regardless of commerce), your Shopify plan (recurring, set by Shopify), and the plugin license (one-time, if you pick a one-time-priced option). The first two are fixed costs you would pay for a Framer site or a Shopify store on their own. The plugin is the only piece where a one-time versus recurring choice changes what you pay a year from now.
Where do Framer online stores actually lose sales after launch?
Almost never from the platform choice itself. Checkout friction is the real cause. Across 50 studies compiled by the Baymard Institute, the average documented cart abandonment rate sits at 70.22%. Strip out shoppers who were just browsing, and the remaining reasons split cleanly: extra costs revealed too late (shipping, tax, fees) account for 40%, slow delivery for 20%, not trusting the site with payment info for 19%, forced account creation for 18%, and a checkout that feels too long or complicated for 17%.
Each of those maps to a specific fix that has nothing to do with which plugin or backend runs underneath:
- Show shipping and estimated tax before the final step, not as a surprise on the last screen.
- Offer guest checkout by default. Forcing an account creates friction exactly where you want the least of it.
- Keep the cart visible with a running total, so the final number is never a surprise.
- Build the checkout flow to load fast on mobile first.
Shopify's own research on headless commerce notes that 40% of consumers will wait no more than three seconds before abandoning a site, one of the practical arguments for a lighter, headless setup like Framer plus Shopify over a heavier, template-driven storefront. Our breakdown of what makes Framer Shopify stores actually convert covers the fixes in more detail.
Can you start small and expand later?
Yes. A Framer online store does not need to launch with a full catalog or every feature wired up. Start with a handful of products, confirm the sync and checkout path work end to end, then add more products, categories, or a second collection once the basics are proven. Shopify stays the system of record for your catalog the whole way, so growing the store later does not mean rebuilding anything you already shipped.
This matters more for a first launch than it looks like it should. Teams that wait for a fully built-out catalog before publishing tend to delay launch for weeks over content that could have shipped with five products and grown from there. Get the sync, cart, and checkout path proven with a small catalog first, then let the product count grow on its own timeline.
What to decide before you touch Shopify
The step-by-step above assumes a catalog already exists somewhere, in Shopify or ready to add there. If you are earlier than that, settle these three things first, since a Shopify store built around the wrong answer to any of them means redoing setup later.
- What you are actually selling. Pick a niche narrow enough to source, photograph, and describe well. One product line done properly outbuilds five done halfway, especially for a solo launch.
- Your first handful of products. A full catalog is not required to start. Five to ten real products with real SKUs is enough to test the sync and checkout path end to end. Placeholder products just mean redoing the test later with real data.
- Store name and domain. Shopify sets your store's default subdomain from the name you give it at signup, and changing that later is more friction than picking carefully upfront. Check domain availability for your actual store name before you commit, not after.
Get these three settled, and the six-step sequence above is the same one to follow.
What to watch in your first week live
The step-by-step ends at publish, but the first week after launch is where problems testing does not catch actually show up.
- Confirm real orders sync, not just your test order. A test checkout proves the wiring works once. The first few real orders prove it works under a live customer's actual payment method, address, and browser. Check that each one lands in Shopify correctly before assuming the integration is done.
- Check inventory counts against Shopify after a few live sales. Sync delays or field mismatches that do not show up in testing can surface once real purchases start decrementing stock. Catch drift early before it oversells a low-stock item.
- Watch for checkout errors under real traffic that test traffic did not show. A test checkout runs from one device, one network, one browser. Real shoppers bring device and connection variety testing does not, so checkout errors that only appear under that variety tend to surface in week one, not before.
Can I add a store to a Framer site I already have?
Yes. Product and cart components are designed to drop into existing pages, a landing page gets a product grid, a blog post gets a buy button, without touching the rest of your site's structure.
Do I need to know code to start a Framer online store?
Not for the plugin path. A sync plugin is designed for someone working in Framer's canvas, not a codebase. A custom Storefront API build does require a developer, since you are writing the API calls and cart logic yourself.
Does Framer handle payments directly?
No. Framer's canvas has no payment processing of its own. Checkout hands off to Shopify's hosted checkout, where payment, tax, and fraud protection actually run.
How long does it take to start a Framer online store?
With a plugin, typically days to about two weeks depending on catalog size and how much custom design work the pages need. A custom Storefront API build runs two to eight weeks or longer for a well-scoped project.
Can I start a Framer online store without a Shopify store already set up?
Yes. A free Shopify development store is enough to build and test your Framer setup before you commit to a paid Shopify plan, so you can confirm the sync and checkout path work before spending anything on the backend.
What happens to my store if I stop paying for the plugin?
Depends on the plugin's pricing model. With a one-time license, there is nothing recurring to stop paying, the components keep working. With a recurring plugin, check its specific terms, since some disable components or checkout access if the charge lapses, which is worth confirming before you build a store around one.
Bottom line: starting a Framer online store
Connect a real commerce backend, sync the catalog, drop in product and cart components, publish. That is the whole path, and a plugin covers the middle two steps in a fraction of the time a custom build takes.
Once the store is live, the thing that actually decides your sales is checkout friction, not the setup you chose to get there. Show costs early, offer guest checkout, keep the cart visible, and load fast on mobile, and the platform underneath becomes invisible to your customers, they just see a store that works.
If you want to start a Framer online store without writing Storefront API calls by hand, Frammerce is built for exactly that, with pricing that starts free so you can test the full setup before committing to anything paid, or get in touch if you want to talk through your specific catalog first.