1. Install the plugin
Open your Framer project and install Frammerce from the Framer Marketplace.Open in Framer
Install Frammerce directly from the Marketplace.
2. Connect your Shopify store
The first time you open Frammerce, you’ll land on the connect form (also reachable later from the CMS screen).1
Paste your store URL
Use the
.myshopify.com domain. Custom primary domains don’t serve the Storefront API.Example: my-shop.myshopify.com2
Paste your Storefront access token
A
shpat_…-prefixed token. If you don’t have one yet, follow Get a Storefront token.3
Click Connect
Frammerce validates the credentials with Shopify, then unlocks the rest of the panel.
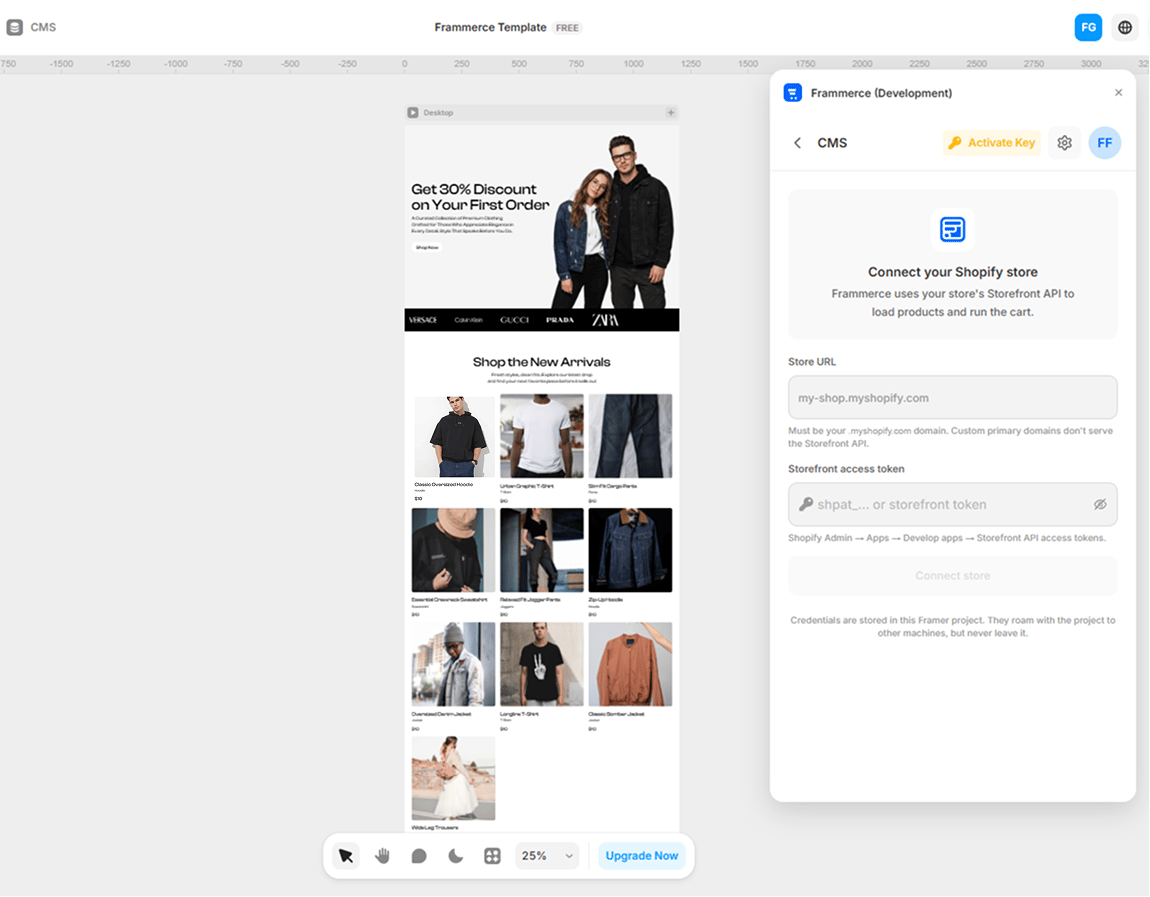
Credentials are stored in this Framer project’s
pluginData only. They travel with the project and never leave it for Frammerce servers.3. Drop in your first component
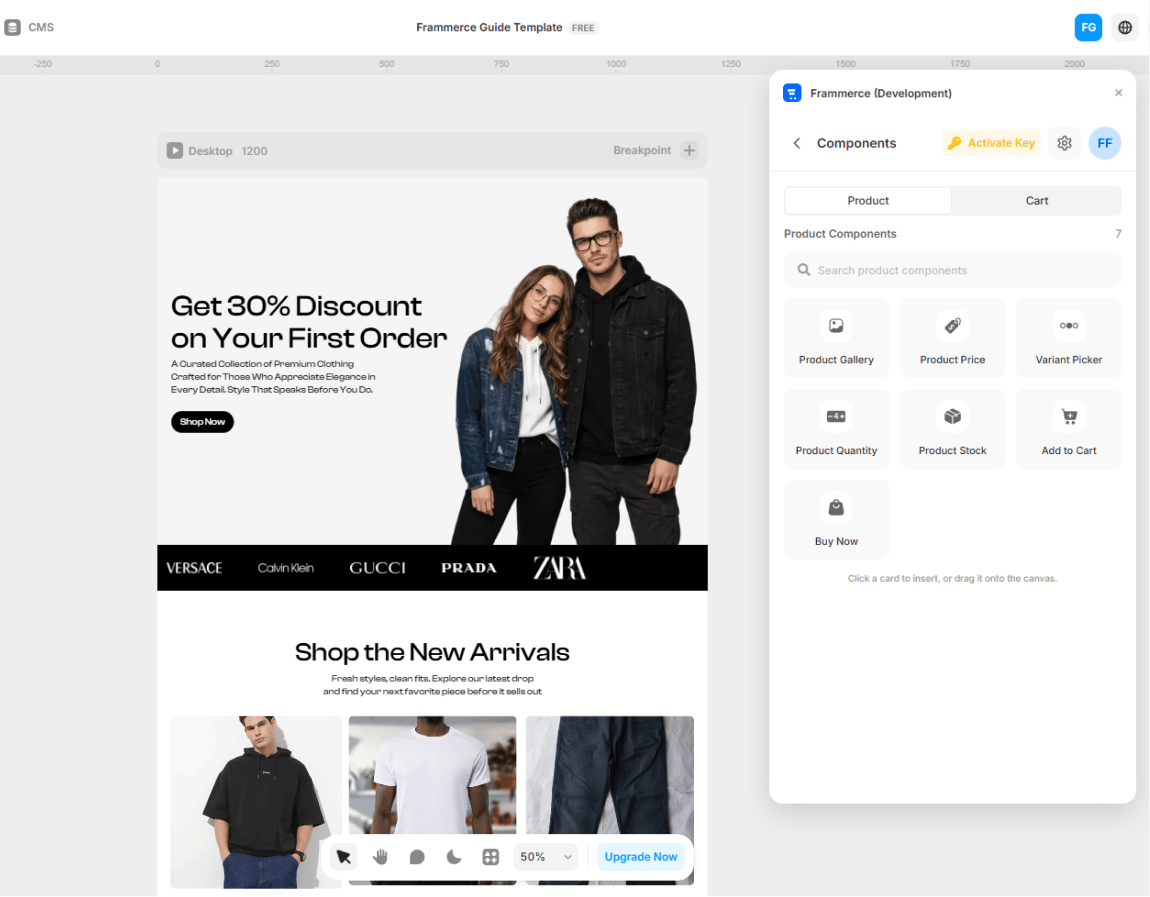
Switch to the Components screen. You’ll see two tabs: Product and Cart.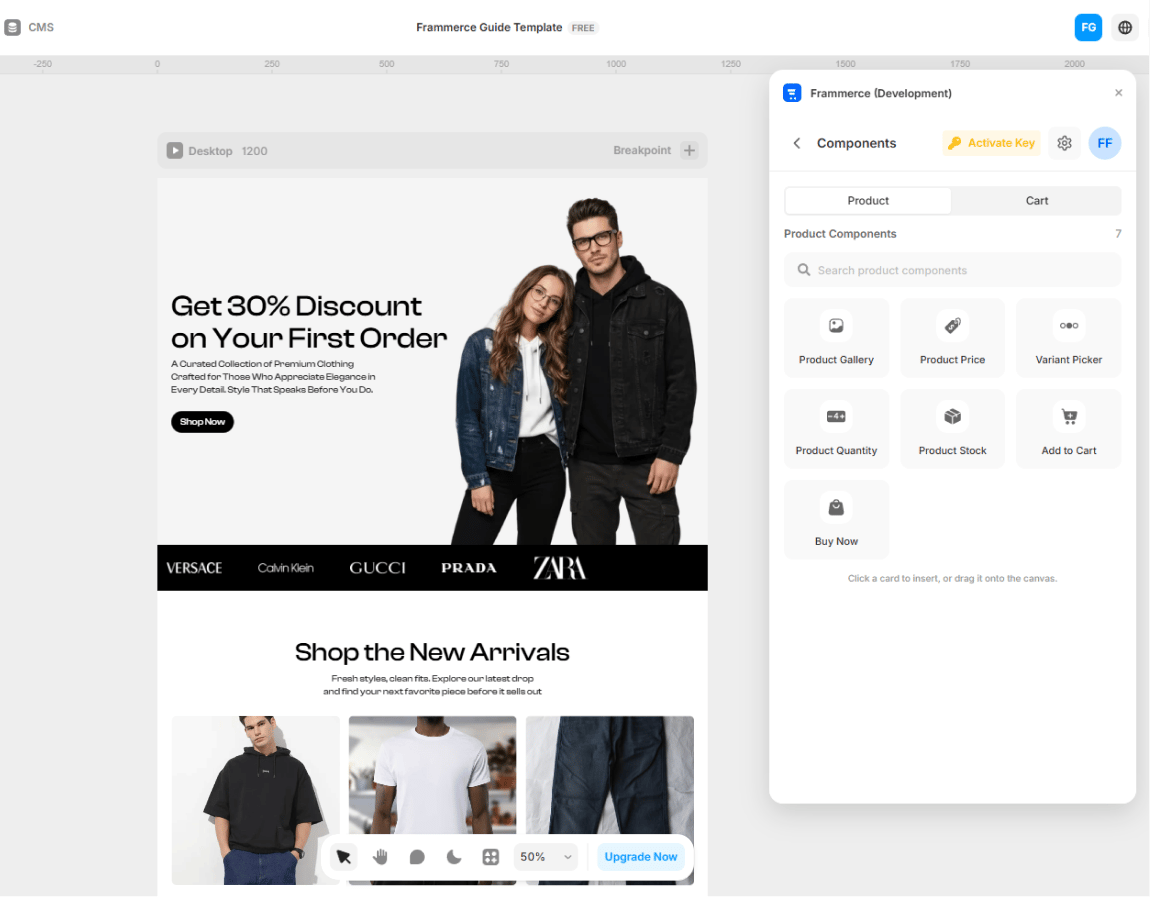
1
Pick a block
Try Product Gallery under the Product tab.
2
Drag or click to insert
- Click a card to insert at the current canvas position
- Drag a card directly onto the artboard
3
Style with Framer
The component lands as a regular Framer code component. Style it like any other layer - colors, layout, breakpoints.
4. Wire the cart
Drag a Cart Button, a Cart Item List, and a Checkout Button onto a Cart page. Frammerce auto-installs the cart runtime into your project’sheadStart - all cart components share the same state as soon as they appear in the same project.
The runtime is installed automatically the first time you insert a component. You don’t have to copy/paste any script.
5. Sync your catalog
Open the CMS screen → Sync products. Frammerce pulls your Shopify products into a Framer managed collection so you can lay out product pages with the CMS you already know.Full CMS sync guide
Field picker, re-syncing, and what to do when a sync fails.